Self-Serve Banners are messages you write for one company and show at the top of the pages its customers open in the self-serve portal. Use them to announce a service interruption, a holiday schedule, or any information those customers need when they sign in. Each banner has its own severity and its own display period, so it appears and disappears on schedule.
Table of Contents
- Configure Who Can View and Edit Self-Serve Banners
- View a Company's Self-Serve Banners
- Create a Self-Serve Banner
- Edit a Self-Serve Banner
- Delete a Self-Serve Banner
- What Customers See in the Self-Serve Portal
- Impact of Self-Serve Banners on Existing Notices
Configure Who Can View and Edit Self-Serve Banners
Access to a company's self-serve banners has two levels, View and Edit. Both sit on the same row of the role's Permissions grid and are mutually exclusive. Back Office access is required on top of either level.
| Level | What It Allows | Without It |
|---|---|---|
| View | Opens the Self-Serve Banners screen of a company in read-only mode. The New Banner button, the garbage can icon and the Save and Delete buttons are not available, and the form fields are disabled. | The Self-Serve Banners button is not shown on Company Details, and the screen cannot be opened. |
| Edit | Everything View allows, plus creating, changing and deleting the company's banners. | A save or a delete is prevented, even when attempted outside the screen. |
Give a role access to self-serve banners:
- Navigate to Settings > Configurations > System > Roles.
- Click the Back Office role you want to change.
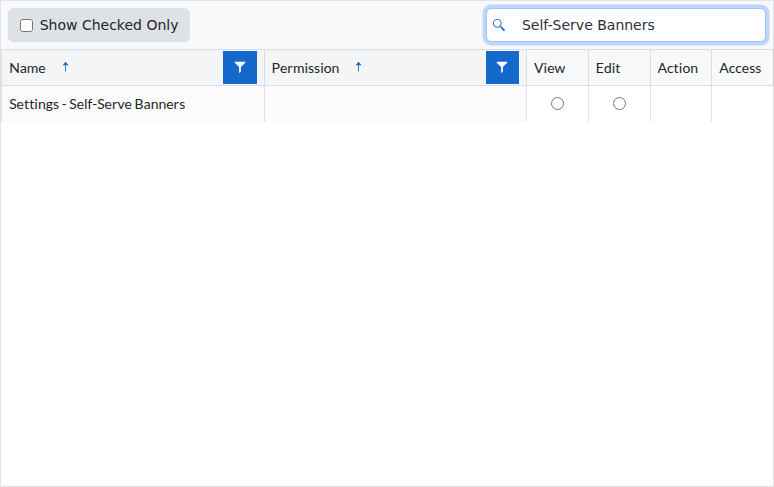
- Find the Settings - Self-Serve Banners row in the Permissions grid.
- Select View for read-only access, or Edit for full management.

- Save the role.
View a Company's Self-Serve Banners
The Self-Serve Banners screen belongs to one company and lists only that company's banners. It shows all of them whatever their schedule, active, scheduled and expired alike, so you can review past and future messages as well as the ones customers are seeing right now.
- Navigate to Settings > Companies.
- Click the company to open Company Details.
- Click Self-Serve Banners in the panel heading, to the left of Save.

The Self-Serve Banners screen opens for that company:
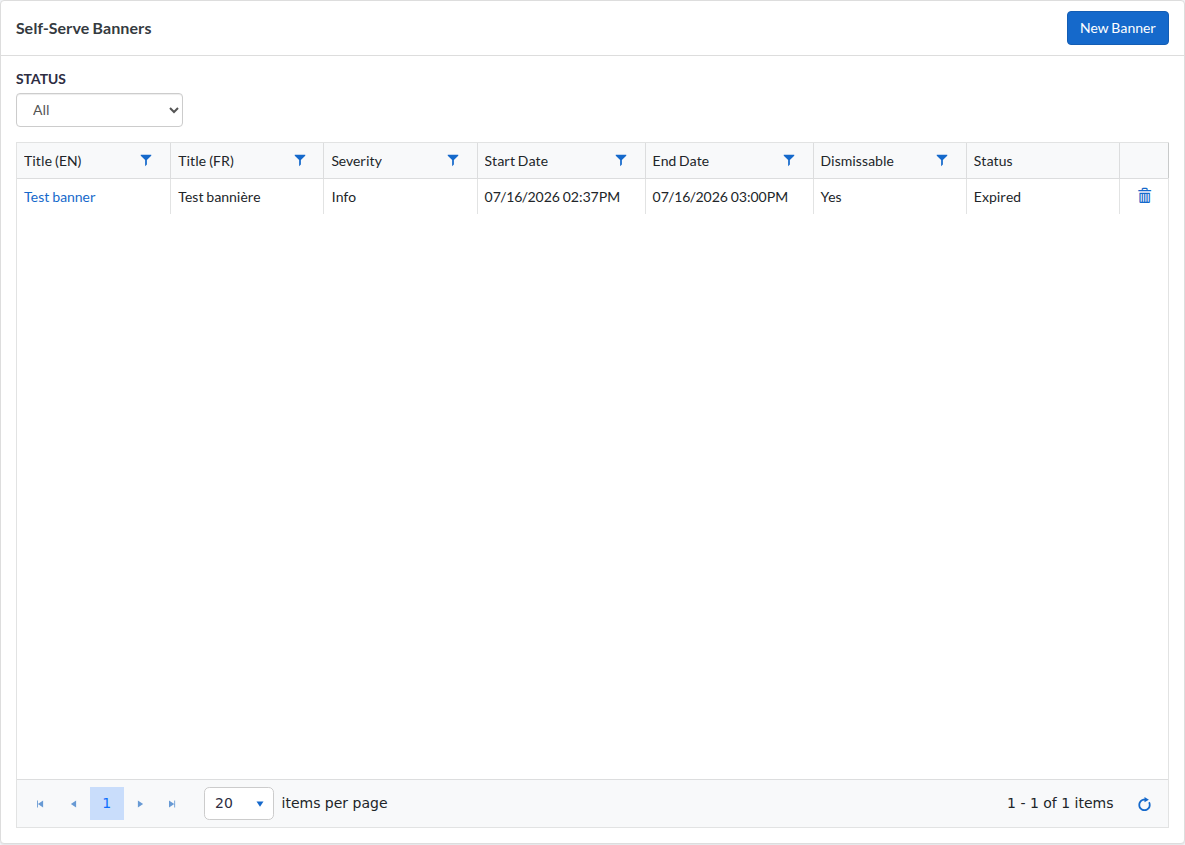
A banner's status is never chosen by the author. It follows the dates: a start date still in the future reads Scheduled, an end date already reached reads Expired, and anything in between reads Active. A banner with no end date does not expire on its own.
What Each Column Shows
The two title columns carry the language they apply to in parentheses, with the codes of your organization's primary and secondary languages, for example Title (EN) and Title (FR).
| Column | What It Shows |
|---|---|
| Title (EN) | The title in your organization's primary language, with its Markdown formatting applied. Click it to open the banner. |
| Title (FR) | The title in your organization's secondary language. |
| Severity | Info, Warning or Critical. |
| Start Date | The date and time the banner starts showing, in your organization's time zone and time format. |
| End Date | The date and time it stops showing. |
| Dismissable | Yes when customers can close the banner, No when they cannot. |
| Status | Active, Scheduled or Expired, computed from the two dates. |
| Last column, no header | The garbage can icon, which opens the delete confirmation dialog box. |
Before you sort anything, the list is ordered by status, Active first, then Scheduled, then Expired, and by start date newest first within one status. The banners customers are seeing right now are therefore at the top. Sorting on any column except Status replaces that order.
Filter the List by Status
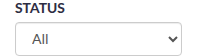
- Select All, Active, Scheduled or Expired in the Status dropdown above the grid. All is the default.
- Narrow the Severity column with its column filter, which lets you check several severities at once.
- Filter the Start Date or End Date column by date and time.
Steps 2 and 3 are optional. Each change re-reads the list, so the statuses shown always reflect the moment of the query.
Create a Self-Serve Banner
A banner belongs to the company you create it under, and it reaches only that company's self-serve users. Dispatch Science shows it on its own once the start date is reached and removes it when the end date is reached, so customers do not need to reload the page.
- Open the Self-Serve Banners screen of the company, as described in View a Company's Self-Serve Banners.
- Click New Banner.
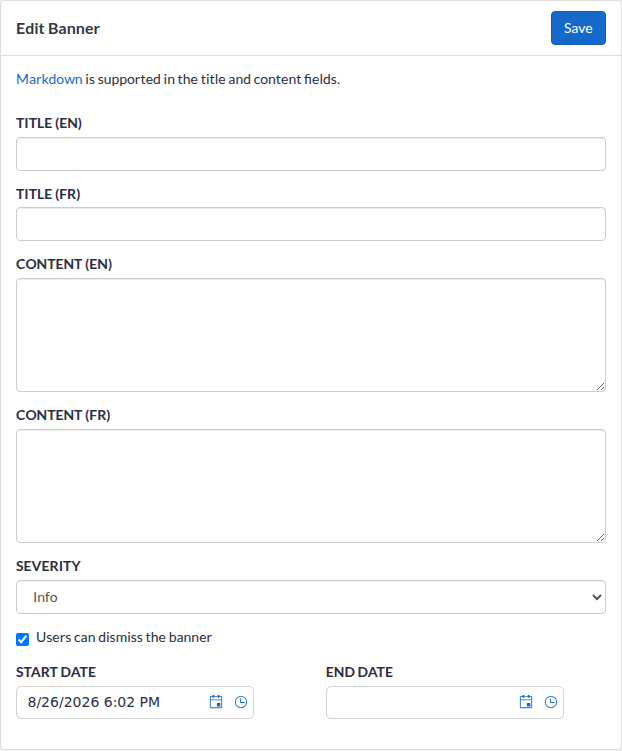
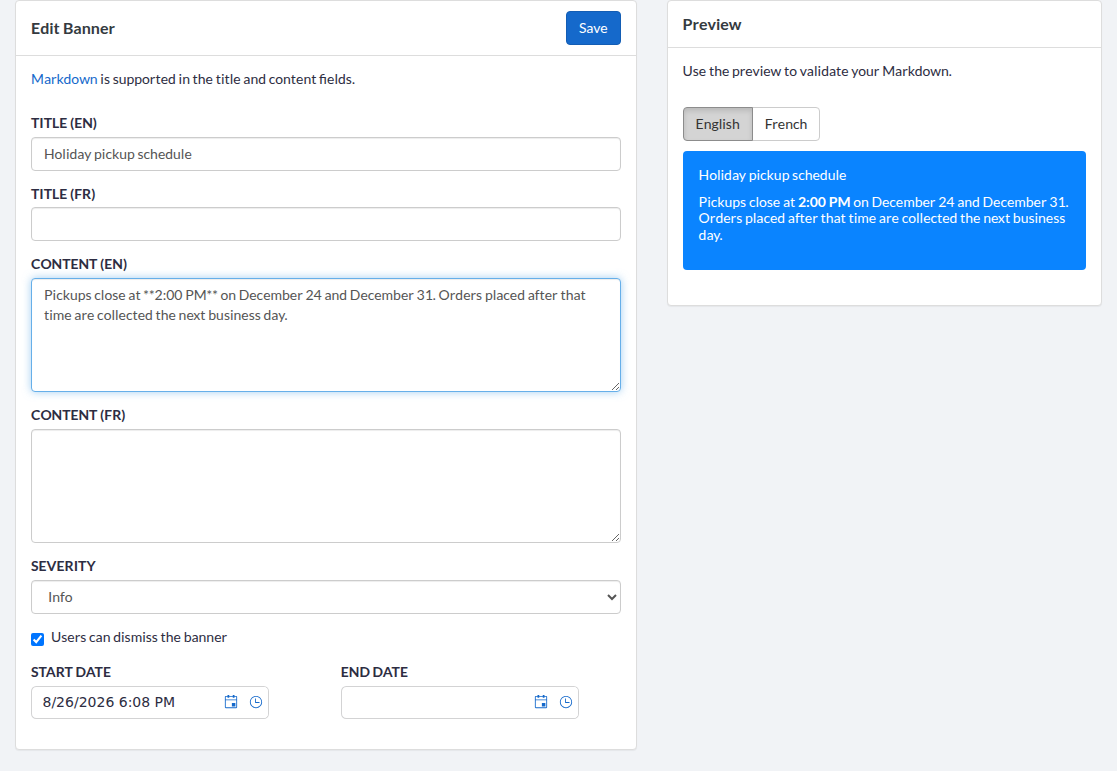
- Enter the required Title and Content in your organization's primary language.
- Enter the optional Title and Content in your organization's secondary language.
- Select the Severity: Info, Warning or Critical. A new banner opens on Info.
- Check the box for Users can dismiss the banner to let customers close it, or clear it to keep the banner on their screen. The box is checked by default.
- Set the Start date, which is required and defaults to the current date and time.
- Set an End date if the banner must stop showing on a given date. Left empty, the banner has no expiry.
- Click Save.
The banner list reopens and shows the confirmation "Banner saved."
Write the Banner in Each Language
Each Title and Content label carries the language it applies to in parentheses, with the codes of your organization's primary and secondary languages, for example Title (EN) and Content (FR).
- The title and the content in the primary language are required.
- The title and the content in the secondary language are optional, and the banner saves without them.
- A customer whose interface is in the secondary language then sees an empty banner, because the bar shows the language of the customer's interface and does not fall back to the other one.
Use Markdown and the Preview
Markdown is supported in the title and content fields, and the form links to the Markdown syntax reference. Links you add always open in a new tab.
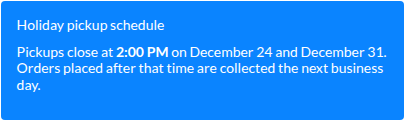
The Preview panel on the right renders the banner as the customer will see it, on the background colour of the selected severity: blue for Info, yellow with dark text for Warning, and red for Critical. It refreshes on every change to a title, a content or the severity. Use the two language buttons above the preview to switch between the primary and the secondary language. As long as the previewed language has neither a title nor a content, the panel reads "Enter a title to preview the banner."
What Prevents a Save
A save without the primary-language title, the primary-language content or the Start date is prevented, and the form comes back with the missing fields flagged.
| Message | What It Means | How to Resolve |
|---|---|---|
| "The end date must be on or after the start date." (under End date) | The end date you picked is earlier than the start date. | Pick an end date on or after the start date, or leave the field empty. |
| "An error occurred while saving the banner." (at the top of the form) | The save did not go through. | Everything you entered is kept, so click Save again without retyping the banner. |
Three scheduling constraints also apply:
- The date pickers do not accept a date earlier than today on a new banner, so a banner cannot be scheduled to start before today.
- A banner whose end date is equal to its start date, or whose end date is already past, is saved and appears in the list, but it is never displayed to a customer. Its status still follows its dates: it reads Scheduled while its start date is in the future, and Expired once that date has passed.
- Seconds are dropped when the banner is saved, so a banner appears and disappears on the minute.
Edit a Self-Serve Banner
Editing changes only what the form exposes. An edit can never move a banner to another company or change its audience, and a banner can only be opened and saved through the company it belongs to.
- Open the Self-Serve Banners screen of the company.
- Click the banner's title in the primary-language title column.
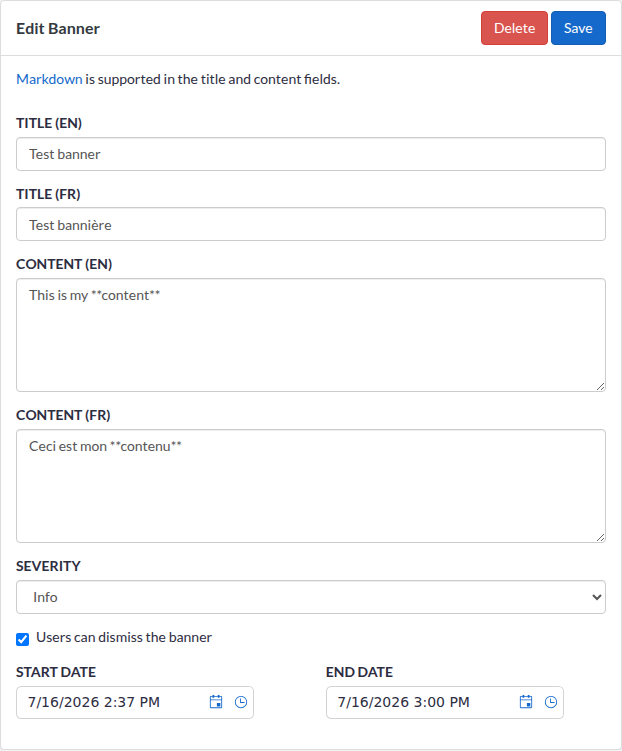
- Change the wording, the severity, the Users can dismiss the banner checkbox or the schedule. The fields behave as described in Create a Self-Serve Banner.
- Click Save.
The banner list reopens and shows the confirmation "Banner saved." On an existing banner, the date pickers do not accept a date earlier than its stored start date, so a schedule can only be moved forward.
Delete a Self-Serve Banner
Deleting a banner is how you stop a message for good. The banner disappears at once from the bar of every customer seeing it, its pending schedule is cancelled, and it leaves the list.
- Open the Self-Serve Banners screen of the company.
- Click the garbage can icon at the end of the banner's row.
- Read the confirmation dialog box:
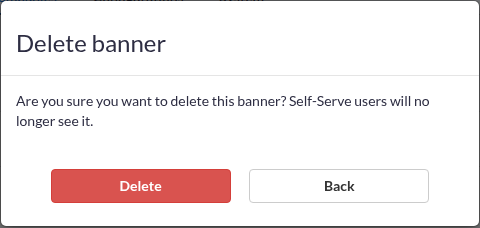
- Click Delete to confirm, or Back to close the dialog box and keep the banner.
Opening the banner and clicking Delete in the form opens the same dialog box. The list reopens and shows the confirmation "Banner deleted." If the deletion does not go through, or if it targets a banner that no longer exists or belongs to another company, the list reopens with the message "An error occurred while deleting the banner." and the banner is left untouched.
What Customers See in the Self-Serve Portal
Customers do not configure banners. Knowing what a company's self-serve users see once a banner is active helps you predict the effect of what you publish. The bar sits at the top of the page and the page content is resized so the bar does not cover it.
Which Banners a Customer Receives
A customer receives the banners of every company reachable from their accounts: the company of their active account, plus the companies of every account available to them through a Master Account. Someone working across several companies therefore gets the banners of all of them at once, and a company they cannot reach never reaches them.
A banner is sent to them when its start date is reached and pulled from their screen when its end date is reached. As they move from page to page, the set of banners that apply is re-evaluated, so a banner meant for one part of the portal appears and disappears as they navigate.
One Banner at a Time
Only one banner is displayed at a time, whatever the number that apply. Banners are presented most severe first, Critical, then Warning, then Info, and most recently created first within one severity. The most serious and most recent message is therefore the one a customer reads first.
When a single banner applies, the bar shows that message alone, with no counter and no arrows. A single banner that customers are allowed to close shows the Dismiss this message button and nothing else; a single banner they cannot close shows no control at all.
Move Between Several Banners
When two or more banners apply, the bar shows a Previous arrow and a Next arrow with a counter between them, such as "2 / 3", giving the position of the banner being read and the total number that apply. The counter is also announced to assistive technology.
The carousel does not wrap around: Previous is disabled on the first banner and Next on the last. The banner a customer stopped on is remembered in their browser and shown again on the pages they open next. When the set changes, because a banner was deleted, or edited and sent again, or because the page they opened applies to a different set, they stay on the banner they were reading, or on the one that takes its place.
Dismiss a Banner
A banner saved with Users can dismiss the banner checked shows a Dismiss this message button. Clicking it removes that banner, and the next remaining one takes its place. Once no banner is left, the bar disappears entirely.
The dismissal is stored in the customer's own browser, so the banner does not come back on the next page or on the next visit from that browser. It is not recorded on the server: another browser, another device or another user is unaffected, and clearing the browser's local storage brings the banner back if it is still within its display period.
A banner saved without Users can dismiss the banner offers no way to close it. The customer keeps it until it expires or is deleted.
Impact of Self-Serve Banners on Existing Notices
Effect on the Back Office Notice Bar
What separates the Back Office notice bar from the self-serve bar is the audience a message was published for, not who wrote it. A banner you create on the Self-Serve Banners screen is published for the self-serve audience only, so it reaches that company's self-serve customers and never appears in a Back Office notice bar. Creating, editing or deleting one does not change what Back Office users see.
Notices published internally by Dispatch Science are addressed to the audiences chosen when they were written. Back Office users keep receiving the ones addressed to a Back Office audience, and a notice addressed to both audiences appears in the Back Office notice bar and in the self-serve portal alike.
Effect on Notices Published by Dispatch Science
Dispatch Science also publishes notices internally that carry no owning company and apply to your whole organization. Because they carry no company, the per-company filter never removes them: both the Back Office and the self-serve portal keep receiving the ones addressed to them. Adding per-company banners did not replace these notices and did not filter them out. A company's banner is simply one more message for that company's customers.
Those organization-wide notices are not listed on the Self-Serve Banners screen and cannot be edited or deleted from it, so the screen is not the full set of messages a customer sees.
For a customer, the two kinds form a single set. The same bar orders them together, most severe first and most recently created first within one severity, as described in One Banner at a Time. Notices published by Dispatch Science and a company's own banners are never kept in separate groups, the "n / total" counter counts them all, and nothing in the bar tells a customer where a message came from. The same order applies on both sides, so the Back Office notice bar orders its messages exactly as the self-serve portal does.
Was this article helpful?
That’s Great!
Thank you for your feedback
Sorry! We couldn't be helpful
Thank you for your feedback
Feedback sent
We appreciate your effort and will try to fix the article