Auto-dispatch streamlines order assignments by automatically dispatching to drivers or providing dispatch suggestions. Below is a step-by-step guide to help you configure and troubleshoot auto-dispatch effectively in Dispatch Science.
Step 1: Enable Auto-Dispatch Features
Auto-dispatch has to be enabled by Dispatch Science, please get in touch with support@dispatchscience.com
Step 2: Configure Vehicle Equivalencies
Set up vehicle equivalencies to ensure smaller vehicles like cars and SUVs can pass overflow work to larger vehicles like vans. This prevents overloading specific drivers. This is a mandatory step,
Guidelines:
Equivalencies should go from smaller to larger vehicles only (e.g., CAR → VAN).
Avoid allowing significantly mismatched equivalencies (e.g., BOXTRUCK → CAR).

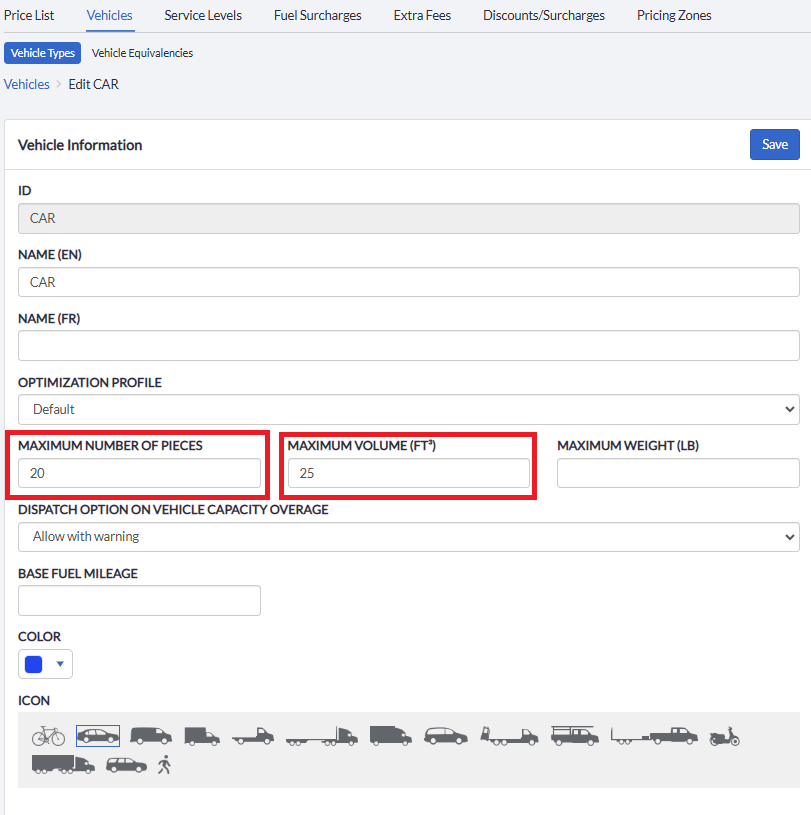
Step 3: Set Vehicle Capacities
Define physical capacity limits for each vehicle type to prevent overloading. Include approximate values for:
Maximum Number of Pieces
Maximum Volume (ft³)
Example: For a CAR:
Maximum Pieces: 50
Maximum Volume: 100 ft³
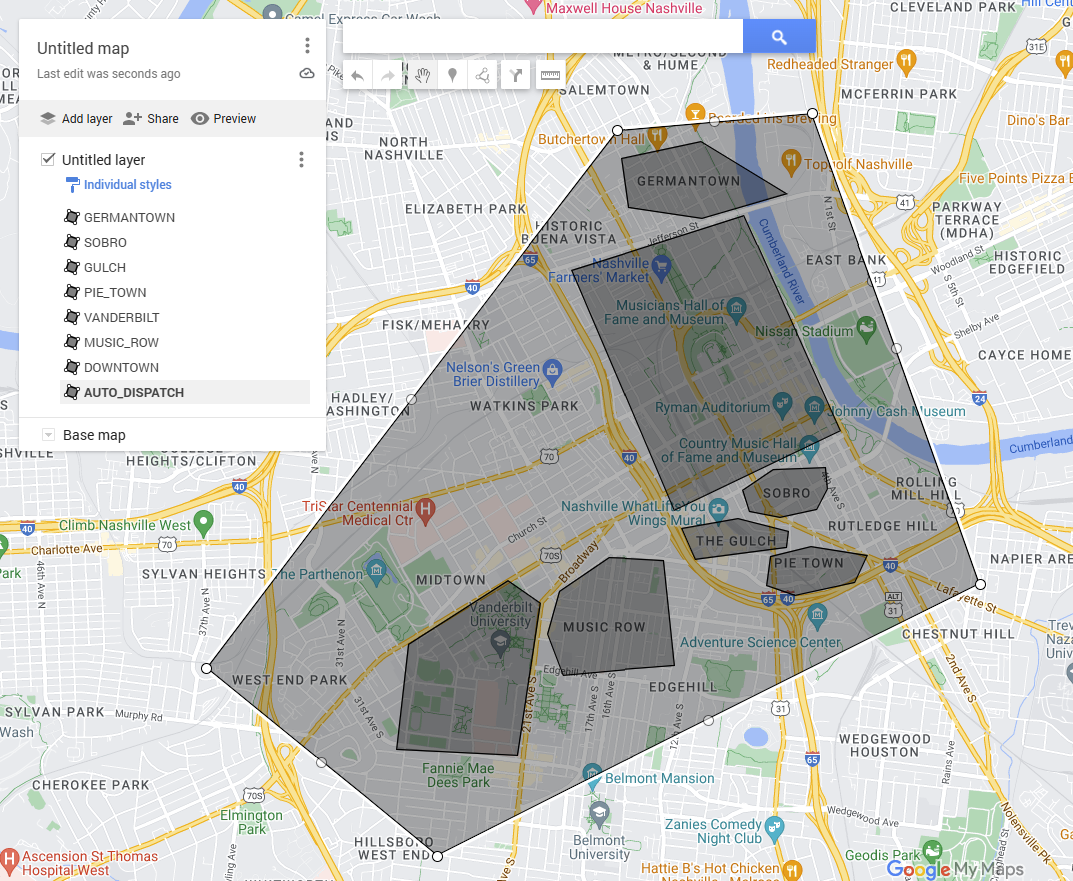
Step 4: Create KML Zones for Auto-Dispatch
Use Google My Maps to create and import KML zones:
Design smaller zones within a larger Auto-Dispatch zone.
Import the KML file to Settings > Zones.
Assign the "Auto Dispatch" type to all zones by selecting them and clicking Add Type.

Note: Pickup and delivery addresses must fall within these zones for auto-dispatch to work.
Step 5: Assign Auto-Dispatch Zones to Drivers
To enable drivers to receive orders through auto-dispatch or suggestions, you need to assign zones in their settings:
Navigate to Drivers > Zones.
Assign the following zones to each driver:
Larger Auto-Dispatch Zone: This zone encompasses all smaller individual zones used for dispatching.
At Least One Smaller Individual Zone: These zones correspond to specific areas where the driver can pick up or deliver orders.
Why this is important:
The larger Auto-Dispatch Zone ensures that drivers are considered for orders within the broader service area.
Smaller individual zones help refine order assignments based on specific pickup and delivery locations, ensuring efficient and targeted dispatching.
Example: A driver operating in a metropolitan area might be assigned:
Larger Zone: "Citywide Auto-Dispatch Zone"
Smaller Zones: "Downtown," "Suburbs North," and "Industrial Park"
Assigning these zones ensures that auto-dispatch can match orders effectively to drivers based on location proximity and availability.

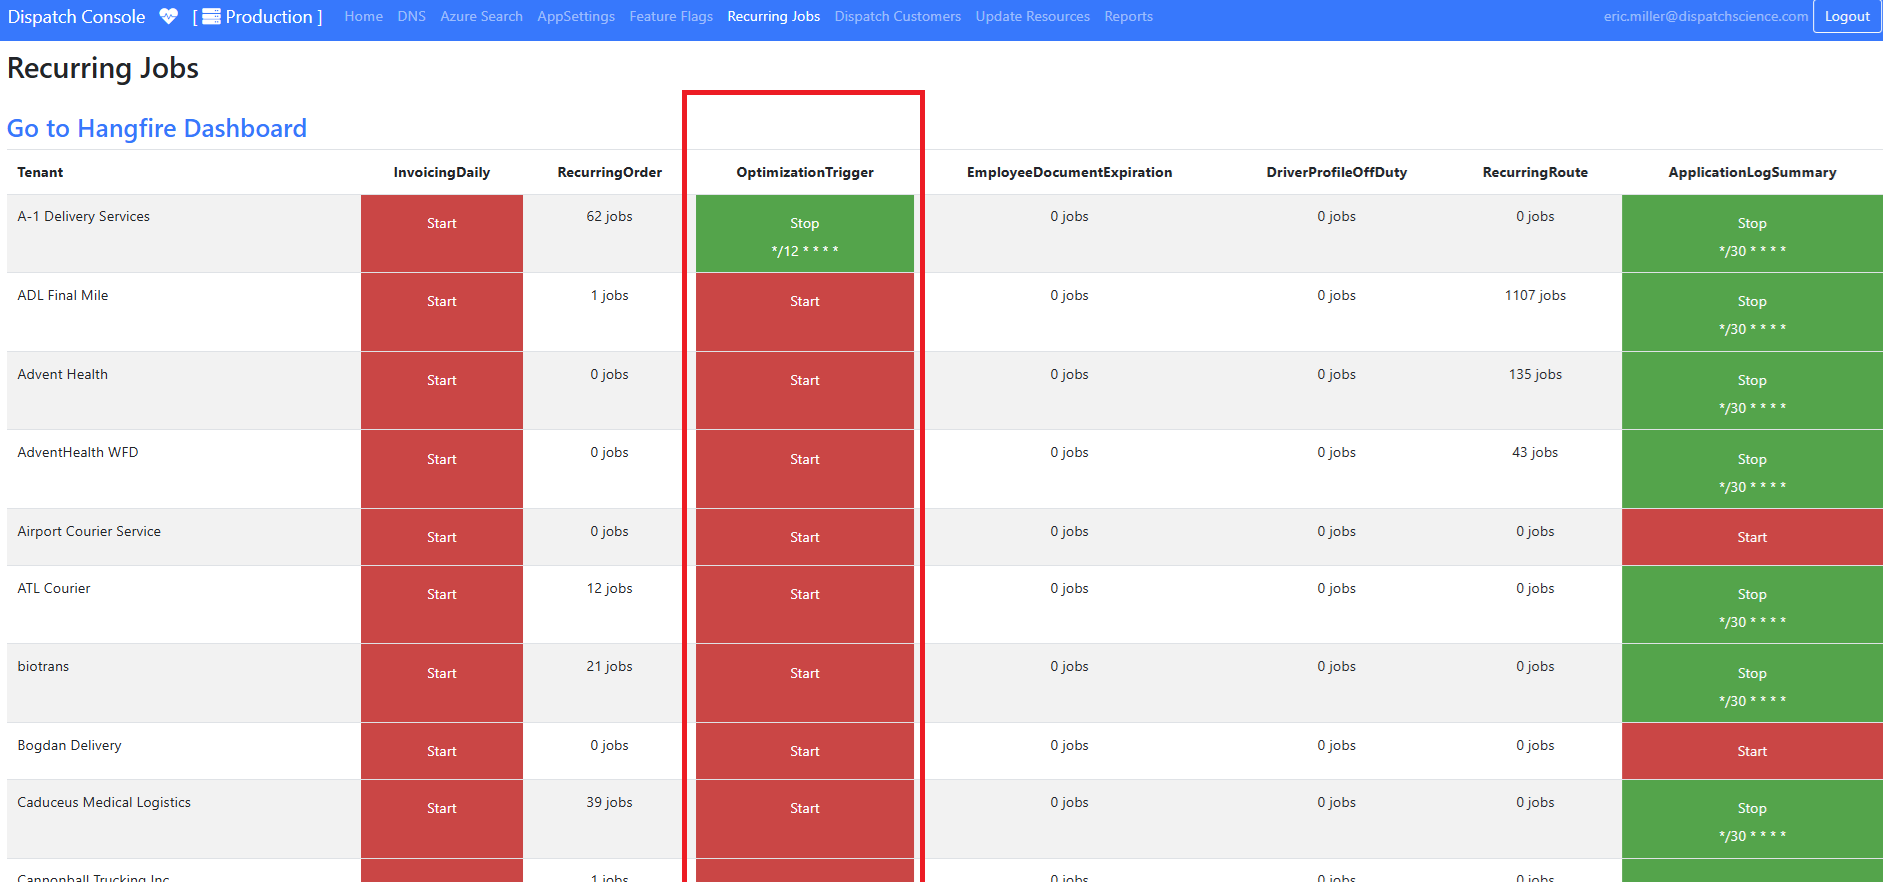
Step 6: Activate Recurring Jobs
Finalize Auto-Dispatch setup by activating recurring jobs:
Go to Console > Recurring Jobs.
Start the OptimizationTrigger.
When you click "Start," a dialog box will prompt you to set the optimization interval. The default value is 12 minutes. You can increase this interval as needed, but it should not be set to less than 12 minutes.
After entering the interval, click Start to activate Auto-Dispatch. The system will now run at the specified intervals.
Troubleshooting Auto-Dispatch
If issues arise, use these steps to resolve them:
Verify Driver Settings:
Location is set to On and Always On.
Driver status is On Duty.
Order Attributes:
Check if the order has special attribute requirements.
Rejected Orders:
Once rejected, a driver will not receive the same order again. Manually assign if needed.
Vehicle Capacity:
Ensure vehicle limits are not exceeded.
Check Optimization History:
Go to Settings > System > Optimizer to view logs, including:
Optimization Start/End Time
Drivers Considered
Orders Processed
Errors
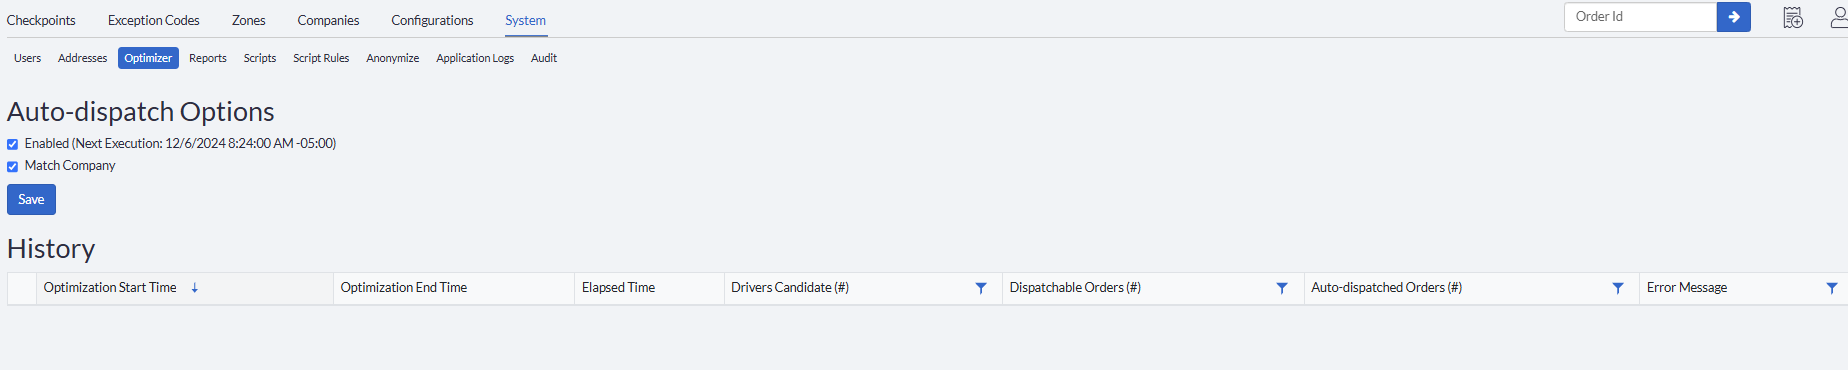
Note: Logs will only display orders where drivers were viable candidates for auto-dispatch, and both pickup and delivery addresses fall within assigned driver zones.
Auto-Suggestions on the Dispatch Board
The Driver Name is suggested when Dispatching on Grid Board

Was this article helpful?
That’s Great!
Thank you for your feedback
Sorry! We couldn't be helpful
Thank you for your feedback
Feedback sent
We appreciate your effort and will try to fix the article