Dispatch Science offers multiple ways to create and manage support tickets. You can submit a ticket directly by email or through the Support Portal. Once a ticket has been created, you can track its progress, communicate with the assi
Create a Support Ticket by Email
You do not need to log in to the Support Portal to create a support ticket.
Simply send an email to:
support@dispatchscience.freshdesk.com
Once your email is received:
- A support ticket is automatically created.
- You will receive an acknowledgment email containing:
- Your support ticket number.
- A direct link to view your ticket.
- You can use this link at any time to review the status of your request.
Create a Support Ticket from the Support Portal
If you prefer, you can create a ticket directly through the Support Portal.
Step 1: Log in
Log in to the Support Portal using your account credentials.
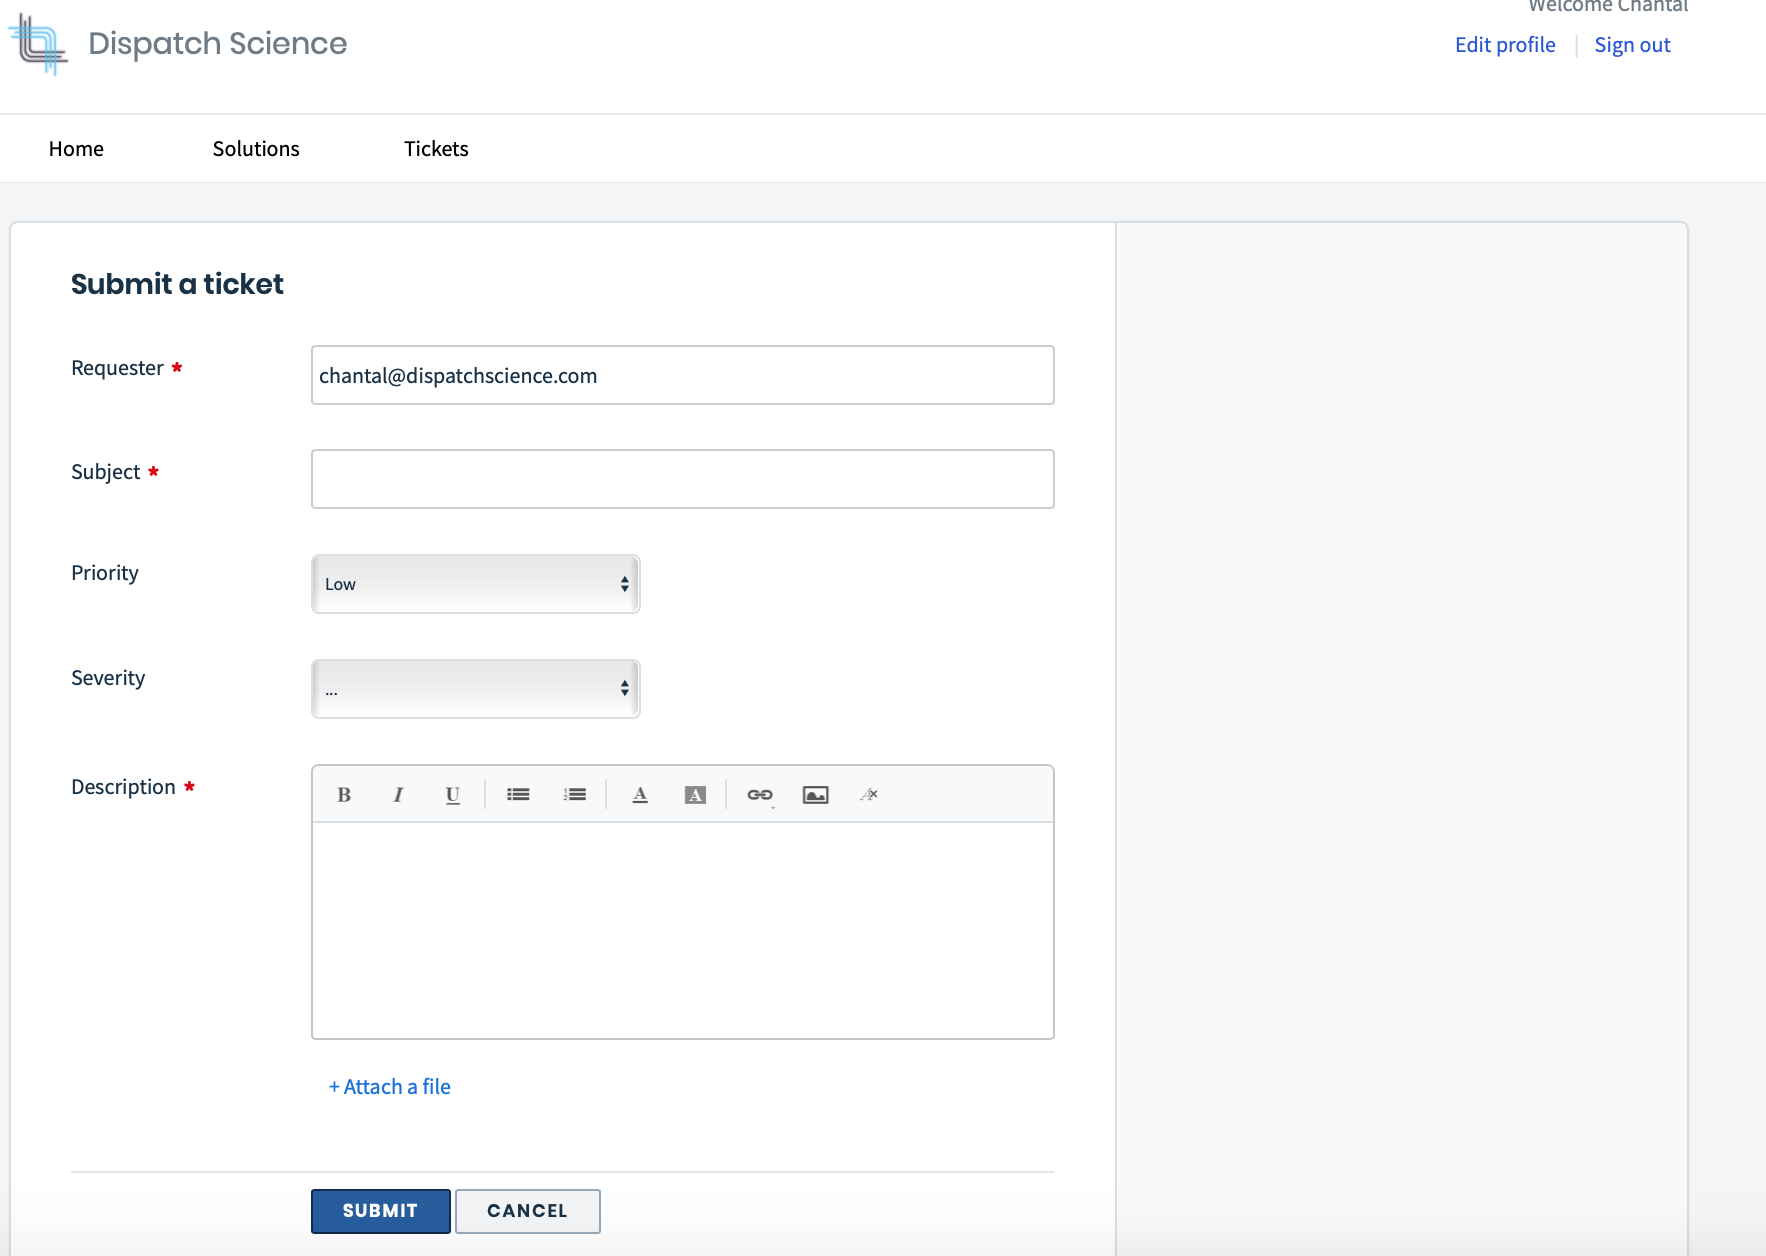
Step 2: Open the New Ticket Form
From the portal, navigate to:
Home → Solutions → Tickets → New Support Ticket
This will open the ticket submission form.
Step 3: Complete the Ticket Details
Your email address will automatically appear in the Requester field.
Complete the remaining fields:
- Subject – Enter a brief summary of the issue.
- Priority – Select the appropriate priority level.
- Severity – Choose the severity that best describes the impact.
In the Description field, provide as much detail as possible, including:
- A clear explanation of the issue.
- When the problem occurred.
- What you were trying to accomplish.
- The steps required to reproduce the issue, if applicable.
Step 4: Attach Supporting Files
If available, attach supporting files such as:
- Screenshots
- Screen recordings
- Error messages
- Documents related to the issue
These attachments help the Support team investigate your request more efficiently.
Step 5: Submit the Ticket
Click Submit.
After submission, you will receive an email confirmation containing:
- Your ticket ID
- A direct link to view and track your ticket
Best Practice
Providing detailed information, screenshots, and clear reproduction steps when submitting a ticket often eliminates the need for additional follow-up from Support and helps resolve your issue more quickly.
Updating a Support Ticket
When a Support representative reviews or updates your ticket, you will receive an email notification.
Update by Email
The easiest way to add information is to reply directly to any email associated with your ticket.
Your reply will automatically:
- Be added to the existing ticket.
- Notify the assigned Support agent.
- Preserve all communication within the ticket history.

Update Through the Support Portal
You can also update your ticket from within the Support Portal.
- Log in to the Support Portal.
- Navigate to Tickets.
- Open the ticket you want to update.
Within the ticket, you can:
- View the assigned Support agent.
- Check the ticket status.
- Update the Priority or Severity if necessary.
After making changes, click Update to save them.
Add Additional Information
To provide more information:
- Click Reply.
- Enter your comments or additional details.
- Attach files if necessary.
- Click Reply to submit your update.

Closing a Support Ticket
If your issue has been resolved and no further assistance is required, you can close the ticket at any time.
Simply open the ticket and click Close Ticket.
Adding Additional Participants
If other users should receive updates about a support request, you can add them as participants.
Open the ticket and click Add People.
Once added:
- All participants will receive email notifications whenever the Support team responds.
- Everyone included can stay informed about the progress of the request.
Closing a ticket
You can close the ticket at any time by clicking on 
Adding people on a ticket
You can add people to a ticket by clicking on 
Dispatch Science offers multiple ways to create and manage support tickets. You can submit a ticket directly by email or through the Support Portal. Once a ticket has been created, you can track its progress, communicate with the assigned support agent, and update the ticket as needed.
Create a Support Ticket by Email
You do not need to log in to the Support Portal to create a support ticket.
Simply send an email to:
support@dispatchscience.freshdesk.com
Once your email is received:
- A support ticket is automatically created.
- You will receive an acknowledgment email containing:
- Your support ticket number.
- A direct link to view your ticket.
- You can use this link at any time to review the status of your request.
Tips for Faster Resolution
For the quickest possible resolution:
- Use a clear, descriptive subject.
- Include detailed information about the issue.
- Provide steps to reproduce the problem whenever possible.
- Attach screenshots, recordings, or error messages.
- Reply to the existing ticket instead of creating a new one for the same issue.
Following these best practices helps the Support team investigate and resolve your request more efficiently.
Was this article helpful?
That’s Great!
Thank you for your feedback
Sorry! We couldn't be helpful
Thank you for your feedback
Feedback sent
We appreciate your effort and will try to fix the article